


You can block dates or time slots very quickly by creating a custom booking form that contains only the fields you really need. For example, you can create a simple form with just a Calendar and a Submit button. Then, on the Add Booking page, select this form, choose the dates, and click Send. This allows you to create bookings in just a few clicks.
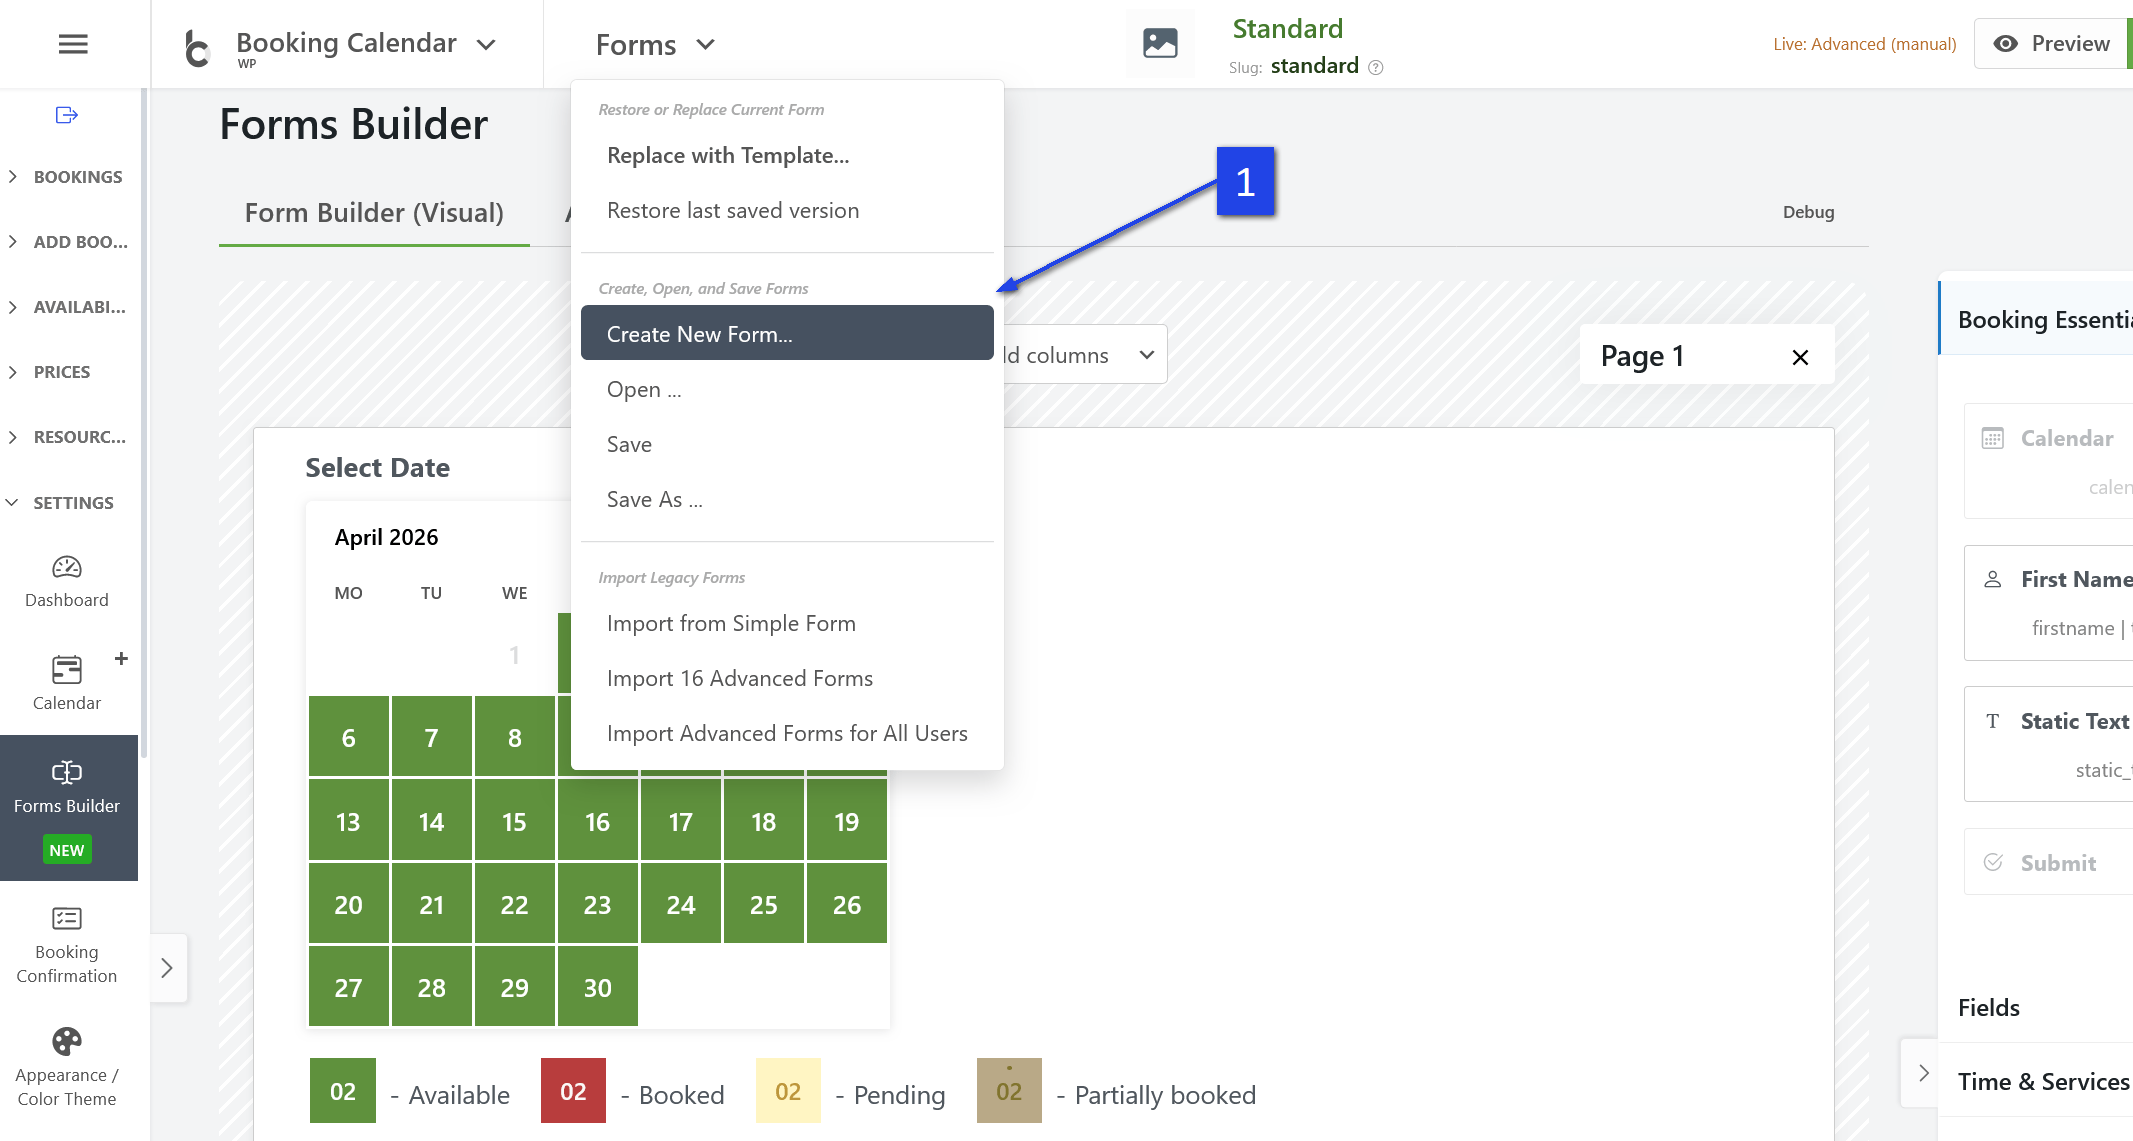
How to create a simple form for blocking dates
- Go to the Form Builder in Booking Calendar.

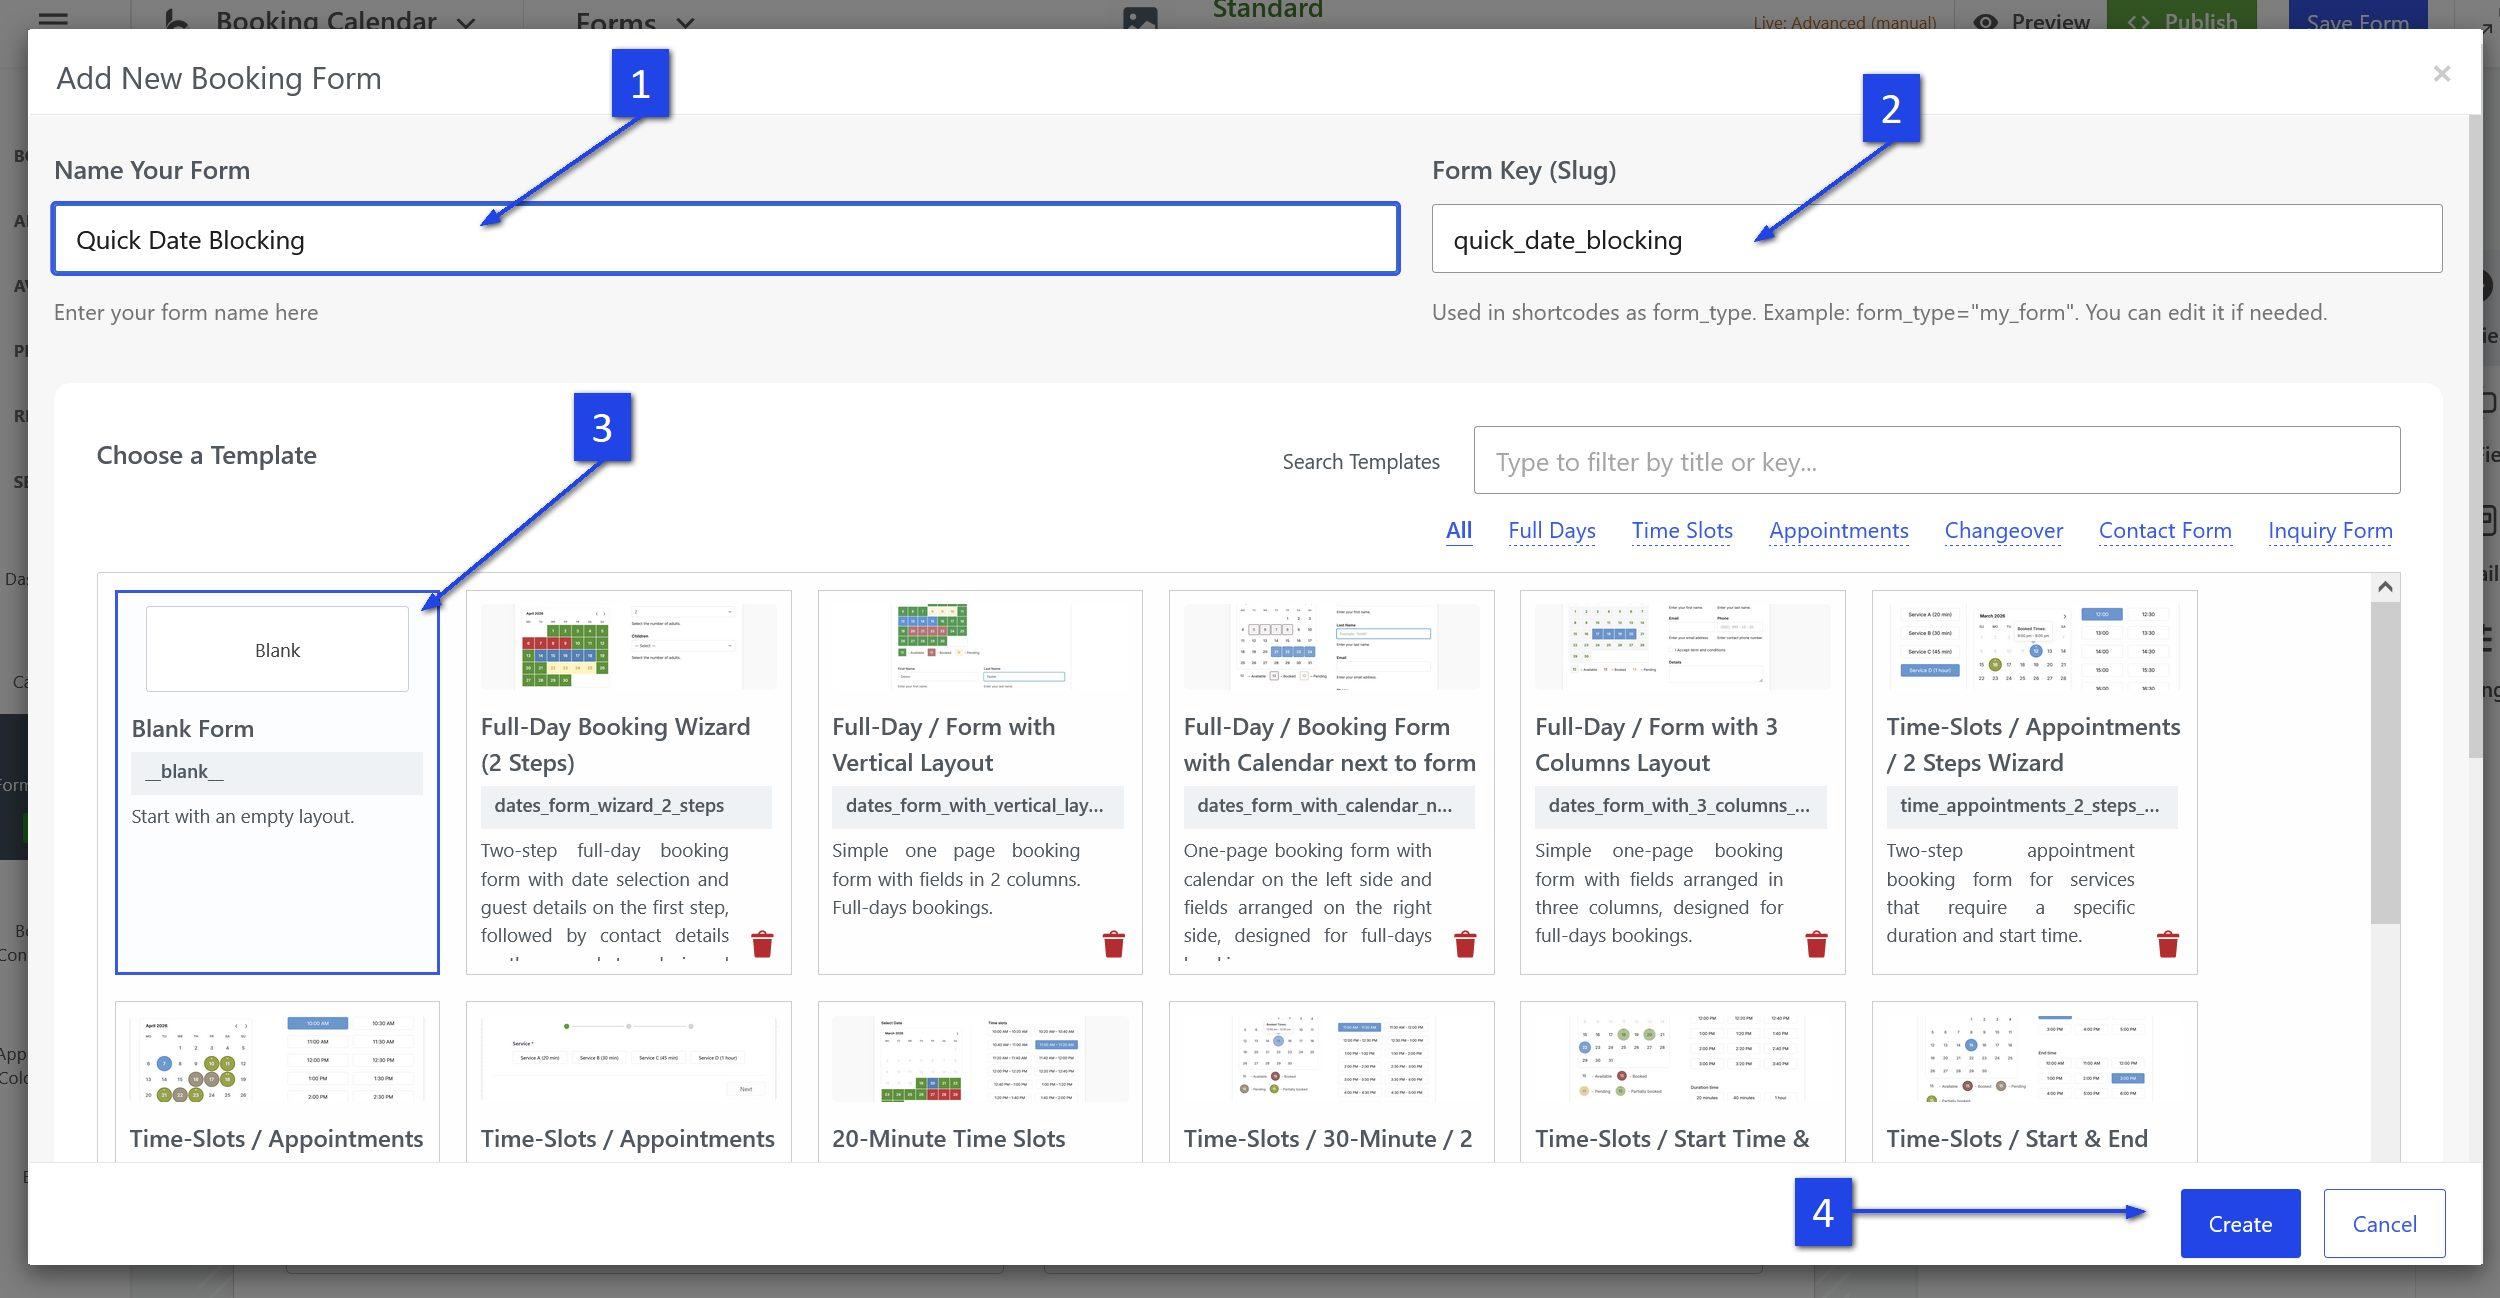
- Create a new custom booking form.

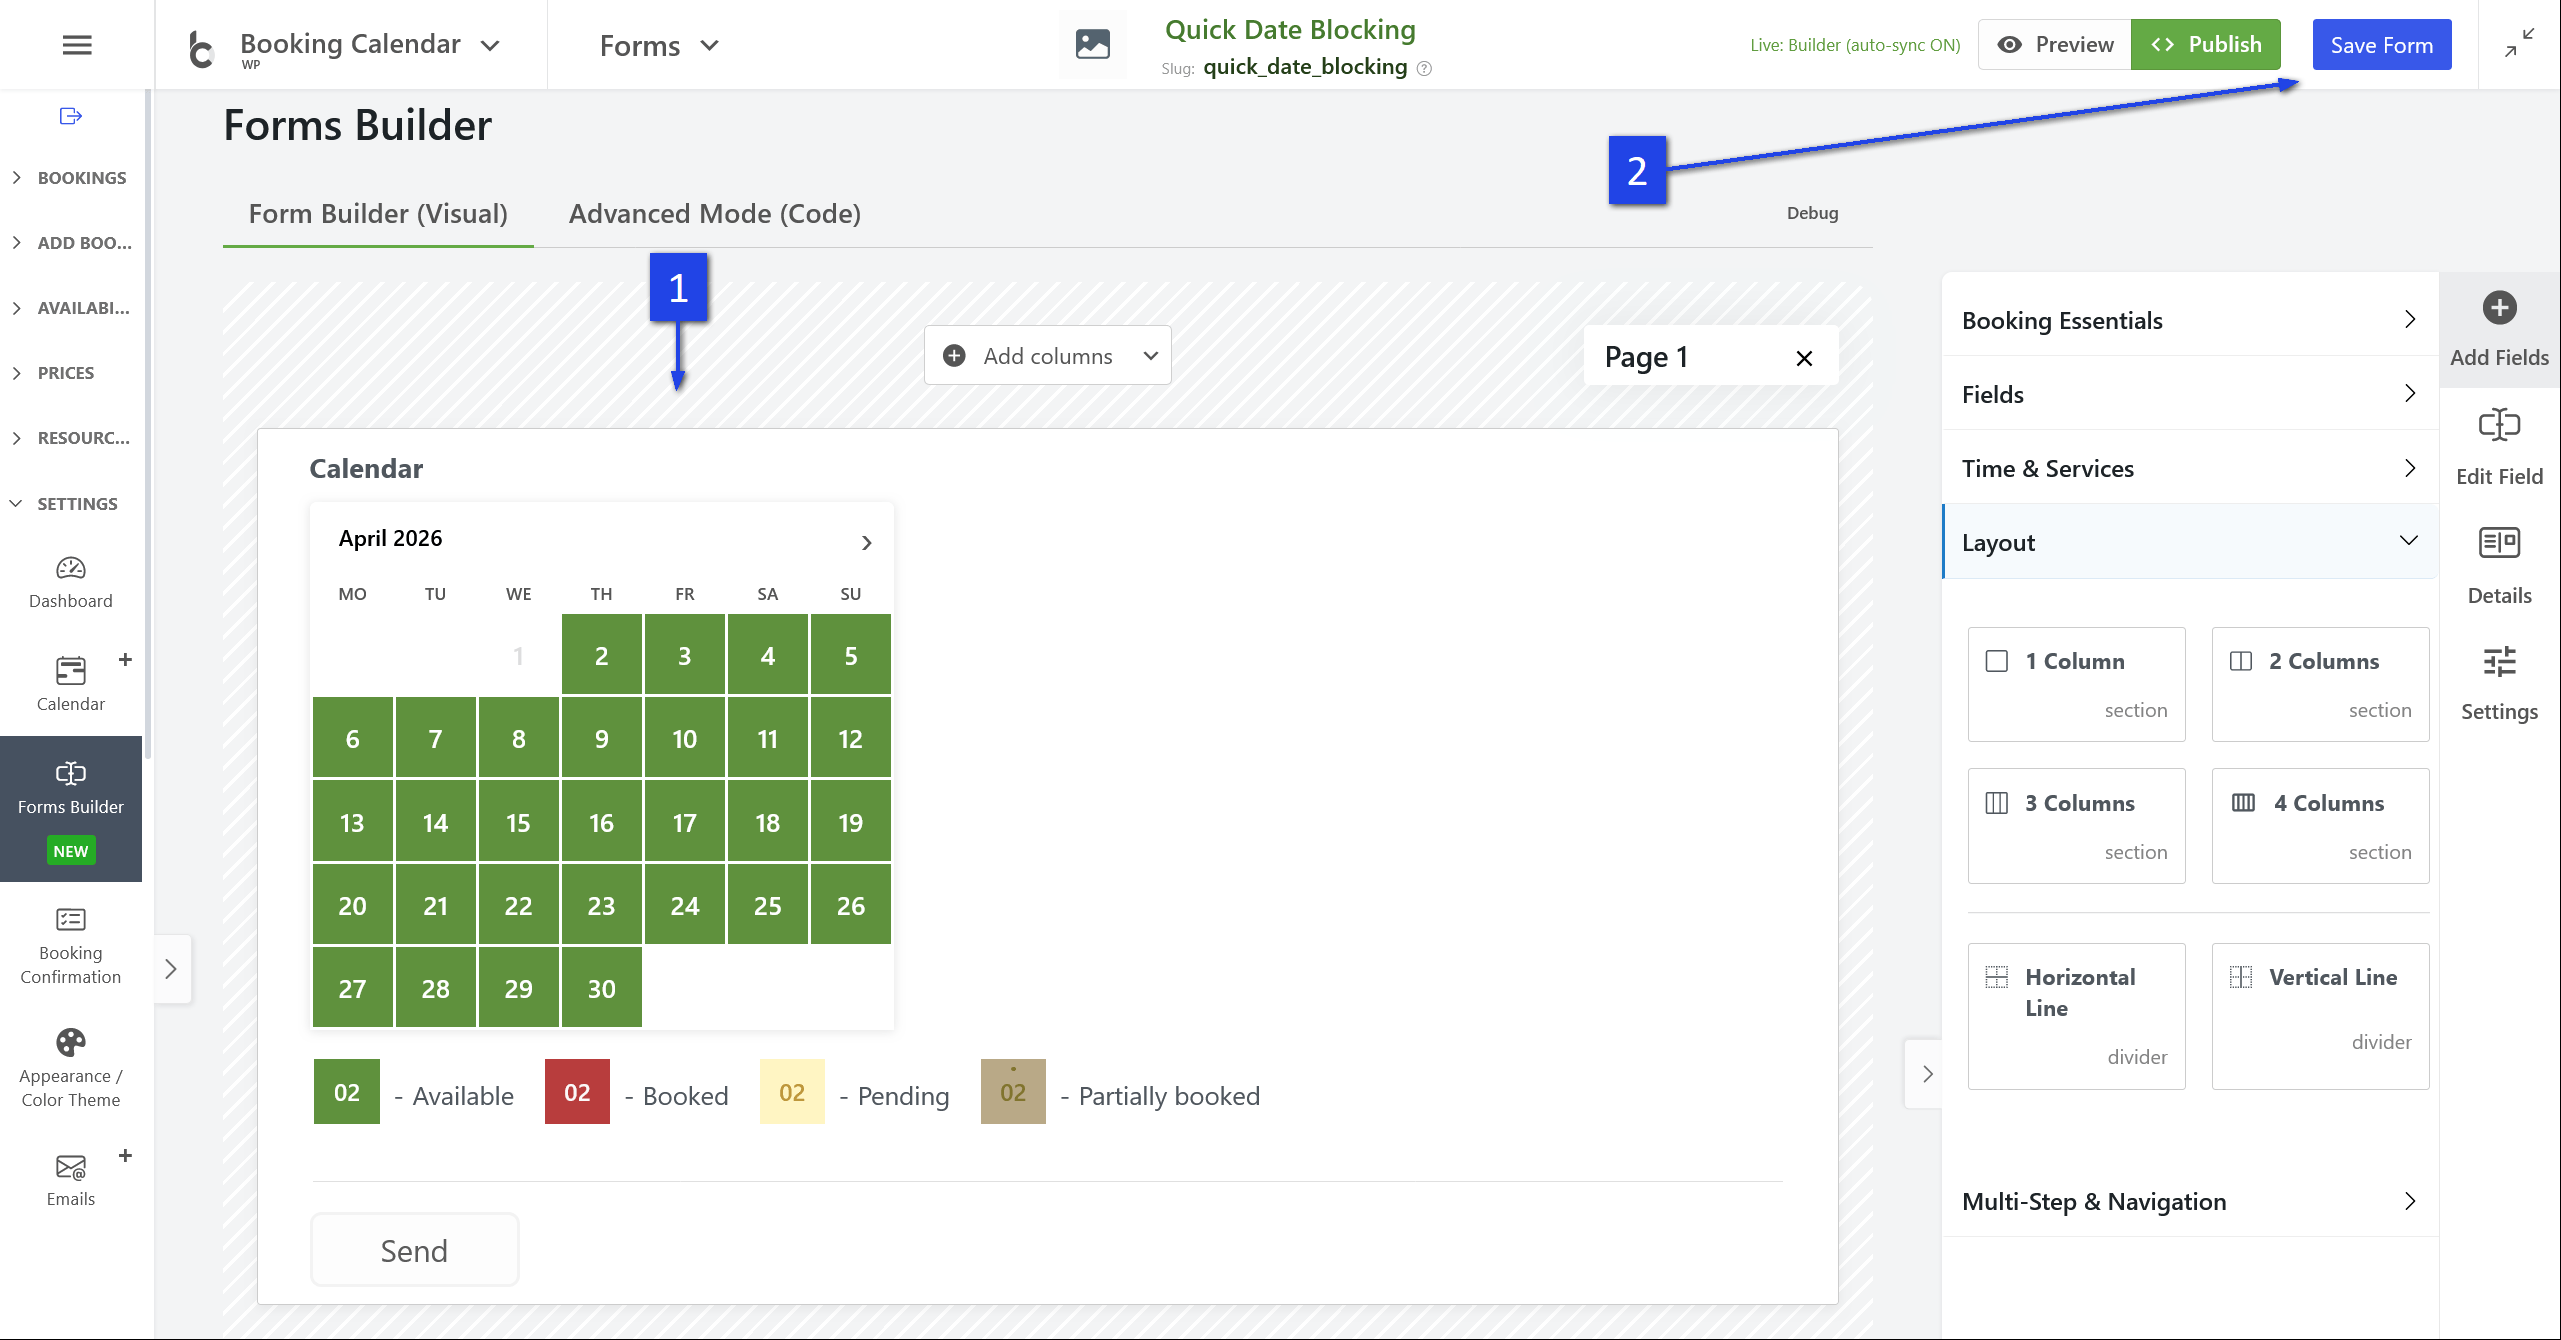
- Remove all unnecessary fields from the form.
- Leave only these fields:
- Calendar
- Submit button
- Save the form with a clear name, such as Quick Date Blocking or Calendar Only.

How to use this form for fast date blocking
- Go to the Add Booking page.
- Select the booking resource where you want to add the booking.
- Choose your new simplified booking form.
- Select the dates in the calendar.
- Click Send.

The selected dates will be added as booked without needing to fill in extra fields.
How to block specific time slots
If you want to block specific time slots instead of full dates, you can create a similar custom form and add the needed time field.
- Open the Form Builder.
- Create a new custom booking form.
- Add these fields:
- Calendar
- Time Slots or Start Time
- Submit button
- Save the form.
How to use the form for blocking time slots
- Go to the Add Booking page.
- Select the booking resource.
- Choose your time-based custom form.
- Select the booking date.
- Select the specific time slot or start time.
- Click Send.
This is a practical way to quickly block appointment times as booked directly from the admin panel.
Tip
You can create different custom forms for different tasks, for example:
- a simple form for blocking full dates,
- a time-based form for blocking time slots,
- and a full booking form for adding customer details when needed.
This helps you manage bookings faster and more efficiently.